Understanding HTML Forms

HTML forms are essential components of modern web applications. They allow users to interact with websites by submitting information that can be processed, stored, or used to initiate actions on the server. Forms power everything from login screens to shopping carts, surveys, and feedback pages.

  • User Interaction: Forms provide an interface for users to input data and make choices.
  • Data Collection: They enable the collection of valuable information for processing or analysis.
  • Communication: Forms often serve as the primary means for users to reach out, provide feedback, or contact support.
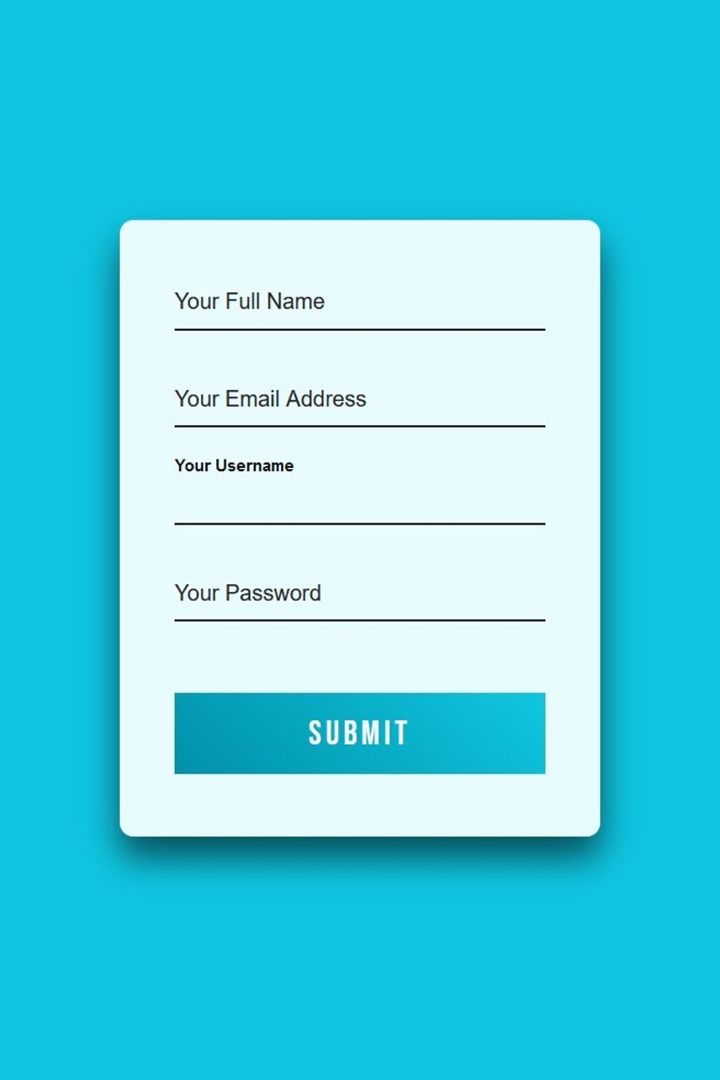
  • Conversion: A well-designed form is critical in e-commerce, lead generation, and user registration, converting visitors into customers or subscribers.

Mastering HTML forms and their best practices is key to building accessible, efficient, and user-friendly web interfaces.

Illustration of various form elements like text inputs, checkboxes, and buttons

Detailed Guide to Form Tags and Input Types

Discover the complete set of HTML form tags and input types. This guide covers everything from the <form> element itself to specialized input types such as email, password, number, date, and more, along with essential form elements like <textarea>, <select>, and grouping elements.

<form> Element

The <form> element is the container for all interactive form controls. Use attributes like action (the URL where form data is submitted) and method (specifies GET, POST, etc.) to define how data is sent.

Example:

<form action="/submit" method="post">
        <!-- Form controls go here -->
      </form>
<label> Element

The <label> element improves form accessibility by associating a text caption with a specific form control. Use the for attribute to bind a label to an input element's id.

Example:

<label for="username">Username:</label>
      <input type="text" id="username" name="username">
<input> Element and Its Types

The <input> element is used for various kinds of data input and features a type attribute to determine its behavior. Here are some common types:

  • text: A single-line text field.
  • password: Text field that masks the entered characters.
  • email: Validates and accepts email address input.
  • number: Accepts only numeric values.
  • date: Provides a date picker interface.
  • radio: Allows selection of one option among a group.
  • checkbox: Enables selection of one or more options.
  • file: Facilitates file uploads.
  • submit: A button that submits the form.
  • reset: Resets the form inputs to their initial values.
  • hidden: Holds data not visible to the user.

Example:

<input type="text" name="fullname" placeholder="Your Full Name">
      <input type="email" name="email" placeholder="you@example.com">
      <input type="password" name="password" placeholder="Enter Password">
      <input type="radio" name="gender" value="male"> Male
      <input type="radio" name="gender" value="female"> Female
      <input type="checkbox" name="subscribe" checked> Subscribe to Newsletter
      <input type="submit" value="Register">
<textarea> Element

The <textarea> element enables multi-line text input. It is ideal for extended user messages or comments.

Example:

<label for="message">Message:</label>
      <textarea id="message" name="message" rows="4" cols="50"></textarea>
<select> and <option> Elements

The <select> element creates a dropdown list, and its <option> children define the available choices.

Example:

<label for="country">Country:</label>
      <select id="country" name="country">
        <option value="usa">USA</option>
        <option value="canada">Canada</option>
        <option value="uk">United Kingdom</option>
      </select>
<button> Element

The <button> element represents a clickable button. It can submit a form, reset data, or trigger custom JavaScript functions.

Example:

<button type="submit">Submit Form</button>
<fieldset> and <legend> Elements

The <fieldset> element groups form elements together, while the <legend> provides a caption for the group, improving the form's structure and accessibility.

Example:

<fieldset>
        <legend>Personal Details</legend>
        <label for="fname">First Name:</label>
        <input type="text" id="fname" name="fname">
        <label for="lname">Last Name:</label>
        <input type="text" id="lname" name="lname">
      </fieldset>

Detailed Guide to HTML Form Controls

Explore every HTML form control available for building fully functional, accessible, and interactive web forms. Learn about inputs, textareas, selects, buttons, and more—each with real-world usage examples.

<input> Elements

The <input> element is your all-purpose form control. Its type attribute defines its functionality:

  • text: For single-line text input.
  • password: For password input (masked characters).
  • email: For email addresses (with built-in validation).
  • number: For numeric inputs, allowing min/max and step values.
  • date: Offers a date picker interface.
  • url: For URL input with validation of proper format.
  • search: Optimized for search queries.
  • tel: For telephone numbers.
  • file: To allow file uploads.
  • radio: Used in groups to let users select only one option.
  • checkbox: For options that can be toggled on or off.
  • hidden: To store data that the user does not see.

Example:

<form action="/submit" method="post">
        <label for="username">Username:</label>
        <input type="text" id="username" name="username" placeholder="Enter your username" required>
        
        <label for="password">Password:</label>
        <input type="password" id="password" name="password" placeholder="Enter your password" required>
        
        <label for="email">Email:</label>
        <input type="email" id="email" name="email" placeholder="you@example.com">
        
        <label for="age">Age:</label>
        <input type="number" id="age" name="age" min="1" max="120">
        
        <label for="birthdate">Birthdate:</label>
        <input type="date" id="birthdate" name="birthdate">
        
        <input type="submit" value="Submit">
      </form>
<textarea> Element

The <textarea> element allows multi-line text input, ideal for capturing longer messages or comments. Customize its display using the rows and cols attributes.

Example:

<label for="message">Message:</label>
      <textarea id="message" name="message" rows="5" cols="50" placeholder="Enter your message here"></textarea>
<select> and <option> Elements

The <select> element creates a dropdown list for choosing one or more options. Use <option> for each item, and <optgroup> to group related choices.

Example:

<label for="country">Country:</label>
      <select id="country" name="country">
        <optgroup label="North America">
          <option value="usa">USA</option>
          <option value="canada">Canada</option>
        </optgroup>
        <optgroup label="Europe">
          <option value="uk">United Kingdom</option>
          <option value="germany">Germany</option>
        </optgroup>
      </select>
<button> Element

The <button> element creates interactive buttons, which can trigger form submission, reset, or custom JavaScript actions. Use the type attribute to specify its function.

Example:

<button type="submit">Submit Form</button>
      <button type="reset">Reset Form</button>
<fieldset> and <legend> Elements

Use the <fieldset> element to group related form controls together. The accompanying <legend> element provides a caption for the group, improving both visual grouping and accessibility.

Example:

<fieldset>
        <legend>Personal Information</legend>
        <label for="fname">First Name:</label>
        <input type="text" id="fname" name="fname">
        
        <label for="lname">Last Name:</label>
        <input type="text" id="lname" name="lname">
      </fieldset>
<label> Element

The <label> element associates text with a form control, enhancing accessibility. When you use the for attribute (matching the control’s id), users can click the label to focus its corresponding control.

Example:

<label for="username">Username:</label>
      <input type="text" id="username" name="username">
<datalist> Element

The <datalist> element provides a list of predefined options for an <input> element. When paired with list on the input, it helps with auto-completion.

Example:

<label for="browser" >Choose your browser:</label>
      <input list="browsers" id="browser" name="browser" placeholder="Select or type...">
      <datalist id="browsers">
        <option value="Chrome">
        <option value="Firefox">
        <option value="Edge">
        <option value="Safari">
      </datalist>
<output> Element

The <output> element displays the result of a calculation or user action. It is often updated dynamically via JavaScript.

Example:

<form oninput="result.value=parseInt(a.value)+parseInt(b.value)">
        <input type="range" id="a" value="50"> +
        <input type="number" id="b" value="50"> =
        <output name="result" for="a b">100</output>
      </form>

Project Task: Build a Comprehensive HTML Form

Follow the tasks below to build a fully functional HTML form that includes various form controls (text inputs, radio buttons, checkboxes, dropdowns, textareas, and file uploads) and incorporate accessibility and validation best practices.

Task 1: Set Up Basic Form Structure

Create a new HTML file and start with a <form> element that includes the appropriate action and method attributes. Then logically group related controls using <fieldset> and <legend>.

<form action="/submit" method="post">
        <fieldset>
          <legend>User Information</legend>
          <!-- Form fields will be added here -->
        </fieldset>
      </form>
Task 2: Add Input Fields for Name, Email, and Password

Add input fields for user details. Each field should have an associated <label> element and use attributes like placeholder and required for basic validation.

<label for="name">Name:</label>
      <input type="text" id="name" name="name" placeholder="Enter your name" required>
      
      <label for="email">Email:</label>
      <input type="email" id="email" name="email" placeholder="name@example.com" required>
      
      <label for="password">Password:</label>
      <input type="password" id="password" name="password" placeholder="Create a password" required>
Task 3: Implement Radio Buttons, Checkboxes, and Dropdown Menus

Add interactive controls that let users choose from a set of options. Use radio buttons for mutually exclusive choices (e.g., gender), checkboxes for multiple selections, and a dropdown list for options such as country selection.

<p>Gender:</p>
      <input type="radio" id="male" name="gender" value="male">
      <label for="male">Male</label>
      <input type="radio" id="female" name="gender" value="female">
      <label for="female">Female</label>
      
      <p>Subscribe to our newsletter:</p>
      <input type="checkbox" id="subscribe" name="subscribe">
      <label for="subscribe">Yes, sign me up!</label>
      
      <label for="country">Country:</label>
      <select id="country" name="country">
        <option value="" disabled selected>Select your country</option>
        <option value="us">United States</option>
        <option value="uk">United Kingdom</option>
        <option value="ca">Canada</option>
      </select>
Task 4: Add a Textarea for Messages and a File Upload Field

Incorporate a <textarea> for capturing longer responses or messages and include a file input element to allow users to upload a file.

<label for="message">Message:</label>
      <textarea id="message" name="message" rows="5" placeholder="Enter your message"></textarea>
      
      <label for="fileUpload">Upload a File:</label>
      <input type="file" id="fileUpload" name="fileUpload">
Task 5: Enhance Accessibility and Form Validation

Ensure that each input control has a matching <label> element and use HTML5 validation attributes (e.g., required, min, maxlength) to help users enter valid data. Consider adding ARIA attributes for improved accessibility.

<label for="userEmail">Email:</label>
      <input type="email" id="userEmail" name="userEmail" placeholder="you@example.com" required aria-required="true">
Task 6: Review and Test Your Form

Test your form in various browsers and devices. Verify that all inputs, validations, and file uploads function as expected. Refine your markup based on user feedback and accessibility guidelines.

<!-- No additional code is needed for this step; use browser tools to test form functionality. -->